
'테스트'에 해당되는 글 2건
- 2020.03.01 :: Springboot - junit을 이용한 DB관련 테스트 작성하는 방법, embedded mongo를 이용한 테스트 1
- 2019.10.10 :: Springboot - Springboot MVC Test(JUnit)

오늘 다루어볼 내용은 테스트 코드에서 DB관련된 테스트를 작성하는 방법이다. 사실 지금까지 여러가지 유닛테스트를 짜면서 로직에 대한 검증을 하긴 했지만, 데이터베이스와 관련된 테스트 작성은 조금 꺼려하기는 했다. 이유는 여러가지이지만, 귀찮은 설정들이 필요하고 사실 외부 환경에 따라 테스트가 실패할 가능성도 있기 때문이다. 하지만 계속 미룰수는 없는 법.. 오늘은 간단하게 데이터베이스관련 된 테스트를 Junit으로 만들어볼 것이다.
환경
- springboot
- mongodb
- junit
다루어볼 예제는 정말 간단한 User 객체에 대한 생성,수정,조회 등을 테스트해볼 것이다.
|
1
2
3
4
5
6
7
8
9
10
11
12
13
14
15
16
17
18
19
20
21
22
23
24
25
26
27
28
29
30
31
32
33
34
35
36
37
38
39
40
41
42
|
buildscript {
ext {
flapdoodleVersion = "2.2.0"
}
}
plugins {
id 'org.springframework.boot' version '2.2.5.RELEASE'
id 'io.spring.dependency-management' version '1.0.9.RELEASE'
id 'java'
}
group = 'com.example'
version = '0.0.1-SNAPSHOT'
sourceCompatibility = '13'
configurations {
compileOnly {
extendsFrom annotationProcessor
}
}
repositories {
mavenCentral()
}
dependencies {
implementation 'org.springframework.boot:spring-boot-starter-data-mongodb-reactive'
implementation 'org.springframework.boot:spring-boot-starter-webflux'
compileOnly 'org.projectlombok:lombok'
annotationProcessor 'org.projectlombok:lombok'
testImplementation('org.springframework.boot:spring-boot-starter-test') {
exclude group: 'org.junit.vintage', module: 'junit-vintage-engine'
}
testImplementation 'io.projectreactor:reactor-test'
testImplementation "de.flapdoodle.embed:de.flapdoodle.embed.mongo:${flapdoodleVersion}"
-> 임베디드 몽고 의존
}
test {
useJUnitPlatform()
}
|
cs |
build.gradle 내용이다.
|
1
2
3
4
5
6
7
8
9
10
11
12
13
14
15
16
17
18
19
20
21
22
23
24
25
26
27
|
@Data
@AllArgsConstructor(staticName = "of")
@NoArgsConstructor
public class User {
@JsonIgnore
private ObjectId id;
@NotNull
private String username;
@NotNull
private Integer age;
@NotNull
private Address address;
private String hobby;
@Data
@AllArgsConstructor(staticName = "of")
@NoArgsConstructor
public static class Address {
@NotNull
private String si;
@NotNull
private String gu;
@NotNull
private String dong;
}
}
|
cs |
간단한 유저 도메인 객체이다.
|
1
2
3
4
5
|
public interface UserRepository {
Mono<User> findUserById(final ObjectId id);
Mono<User> updateUser(final User user);
Mono<User> createUser(final User user);
}
|
cs |
해당 인터페이스는 DB Access 구현 방식에 구애 받지 않고 core한 영역에서 사용하기 위한 User Data Access 인터페이스이다. 나머지 코드를 보면 왜 구현 코드에 구애 받지 않는지 알 수 있다.
|
1
2
3
4
5
6
7
8
9
10
11
12
13
14
15
16
17
18
19
20
21
22
23
24
25
26
27
28
29
30
31
32
33
34
35
36
37
38
39
40
41
42
43
44
45
46
47
48
49
50
51
52
53
54
55
56
57
58
|
@Data
@AllArgsConstructor(staticName = "of")
@NoArgsConstructor
@Document("User")
public class UserData {
@Id
private ObjectId id;
private String name;
private Integer age;
private AddressData userAddress;
private String hobby;
@Data
@AllArgsConstructor(staticName = "of")
@NoArgsConstructor
public static class AddressData {
private String si;
private String gu;
private String dong;
public User.Address from() {
return User.Address.of(
si,
gu,
dong
);
}
public static UserData.AddressData to(User.Address address) {
return UserData.AddressData.of(
address.getSi(),
address.getGu(),
address.getDong()
);
}
}
public User from() {
return User.of(
id,
name,
age,
userAddress.from(),
hobby
);
}
public static UserData to(User user) {
return UserData.of(
user.getId(),
user.getUsername(),
user.getAge(),
AddressData.to(user.getAddress()),
user.getHobby()
);
}
}
|
cs |
실제 DB Access를 위한 엔티티 클래스이다.
|
1
2
3
4
5
6
7
8
9
10
11
12
13
14
15
16
17
18
19
20
21
22
|
@Repository
@RequiredArgsConstructor
public class UserRepositoryImpl implements UserRepository {
private final UserMongoRepository repository;
@Override
public Mono<User> findUserById(final ObjectId id) {
return repository.findById(id).map(UserData::from);
}
@Override
public Mono<User> updateUser(final User user) {
return repository.save(UserData.to(user)).map(UserData::from);
}
@Override
public Mono<User> createUser(final User user) {
return repository.save(UserData.to(user)).map(UserData::from);
}
}
|
cs |
실제 DB Access 구현체를 필드에 가지고 있는 UserRepository의 구현체이다. 즉, core(프레임워크에 영향을 받지 않는 비지니스 영역)한 영역에서 UserRepository를 사용할때는 구현체에 대한 자세한 정보가 필요하지 않고 DI해서 사용하면 되는 것이다.
|
1
|
public interface UserMongoRepository extends ReactiveMongoRepository<UserData, ObjectId> { }
|
cs |
UserRepositoryImpl가 가지고 있는 DB Access Object 구현체이다.
|
1
2
3
4
5
6
7
8
9
10
11
12
13
14
15
|
@Configuration
@EnableReactiveMongoRepositories(basePackages = {"com.example.test.data.db.repositories"}, reactiveMongoTemplateRef = "userMongoTemplate")
public class MongoConfig {
@Bean
public MongoClient mongoClient() {
return MongoClients.create("mongodb://localhost:27017");
}
@Bean
public ReactiveMongoTemplate userMongoTemplate(MongoClient mongoClient) {
return new ReactiveMongoTemplate(mongoClient, "USER_DB");
}
}
|
cs |
몽고디비 설정이다. 여기까지 실제 동작하는 코드 영역의 클래스들이다. 이러한 클래스들이 잘 동작하길 원할 것이고, 실제 테스트를 해볼 것이지만 효율적인 테스트 방법이 무엇일까? 관련 API를 만들어서 직접 호출해본다? 과연 좋은 테스트 방법인지는 모르겠다. 이러한 DB 관련 테스트 코드를 짜보자.
|
1
2
3
4
5
6
7
8
9
10
11
12
13
14
15
16
17
18
19
20
21
22
23
24
|
@TestConfiguration
@EnableReactiveMongoRepositories(basePackages = {
"com.example.test.data.db.repositories"
}, reactiveMongoTemplateRef = "userTestMongoTemplate")
public class TestEmbeddedMongoConfig {
@Bean(initMethod = "start", destroyMethod = "stop")
public MongodExecutable mongodExecutable() throws IOException {
MongodStarter starter = MongodStarter.getDefaultInstance();
IMongodConfig mongoDConfig = new MongodConfigBuilder()
.version(Version.Main.V3_4)
.net(new Net("127.0.0.1", 27017, false))
.build();
return starter.prepare(mongoDConfig);
}
@Bean("userTestMongoTemplate")
public ReactiveMongoTemplate mongoTemplate() throws IOException {
MongoClient mongo = MongoClients.create("mongodb://localhost:27017");
return new ReactiveMongoTemplate(mongo, "USER_TEST_DB");
}
}
|
cs |
해당 설정은 테스트 코드에서만 사용하기 위한 설정이다. 몽고디비는 임베디드 몽고를 사용할 것이다. 필자로 사실 내부적으로 정확히 어떻게 동작하는지는 자세히 보지 않았지만, 실제 특정 포트를 물고 프로세스로 뜬다. 그래서 직접 포트 번호, ip를 기입해준다. 설정들이 다양하지만 간단히 예제를 다루어보는 것임으로 간단하게 설정을 마친다.
다음은 실제 테스트 코드이다.
|
1
2
3
4
5
6
7
8
9
10
11
12
13
14
15
16
17
18
19
20
21
22
23
24
25
26
27
28
29
30
31
32
33
34
35
36
37
38
39
40
41
42
43
44
45
46
47
48
49
50
51
52
53
54
55
56
57
58
59
60
61
62
63
64
65
66
67
68
69
70
71
72
73
74
75
76
77
78
79
80
81
82
83
84
85
86
87
88
89
90
91
|
@ContextConfiguration(
initializers = ConfigFileApplicationContextInitializer.class,
classes = {
TestEmbeddedMongoConfig.class,
UserRepositoryImpl.class
})
@ExtendWith(SpringExtension.class)
public class UserRepositoryTest {
@Autowired
private UserRepository userRepository;
private User initData;
@BeforeEach
public void setup() {
initData = userRepository.createUser(
User.of(
new ObjectId(),
"yeoseonggae",
29,
User.Address.of("seoul", "kangbuk", "mia"),
"none"
)
).block();
}
@Test
@DisplayName("유저 데이터 생성 테스트")
public void createUserTest() {
//준비
User createUser = User.of(
new ObjectId(),
"UserName",
29,
User.Address.of("seoul", "kangbuk", "mia"),
"none"
);
//실행
Mono<User> createdUser = userRepository.createUser(createUser);
//단언
StepVerifier.create(createdUser)
.assertNext(user -> {
assertEquals(user.getUsername(), "UserName");
assertEquals(user.getAge(), 29);
assertEquals(user.getHobby(), "none");
assertEquals(user.getAddress().getSi(), "seoul");
}).verifyComplete();
}
@Test
@DisplayName("유저 데이터 수정 테스트")
public void updateUserTest() {
//준비
initData.setUsername("여성게");
//실행
Mono<User> updatedUser = userRepository.updateUser(initData);
//단언
StepVerifier.create(updatedUser)
.assertNext(user -> {
assertEquals(user.getId().toHexString(), initData.getId().toHexString());
assertEquals(user.getUsername(), "여성게");
assertEquals(user.getAge(), 29);
assertEquals(user.getHobby(), "none");
assertEquals(user.getAddress().getSi(), "seoul");
}).verifyComplete();
}
@Test
@DisplayName("유저 이름으로 유저 데이터 조회 테스트")
public void findUserByNameTest() {
//준비
final ObjectId id = initData.getId();
//실행
Mono<User> findUser = userRepository.findUserById(id);
//단언
StepVerifier.create(findUser)
.assertNext(user -> {
assertEquals(user.getUsername(), "yeoseonggae");
assertEquals(user.getAge(), 29);
assertEquals(user.getHobby(), "none");
assertEquals(user.getAddress().getSi(), "seoul");
}).verifyComplete();
}
}
|
cs |
바로 위에 있는 테스트 몽고 설정을 import 한다. 그리고 우리는 UserRepository를 테스트 할것임으로 모든 빈들을 가져올 필요가 없이 테스트에 필요한 빈만 주입받아서 테스트 코드를 작성한다. 과연 결과는 어떻게 될까?(위 코드에 조금더 추가하여 실제로 데이터가 어떻게 왔다갔다하는지 콘솔로 찍었다.)
우선 테스트 성공 여부이다.
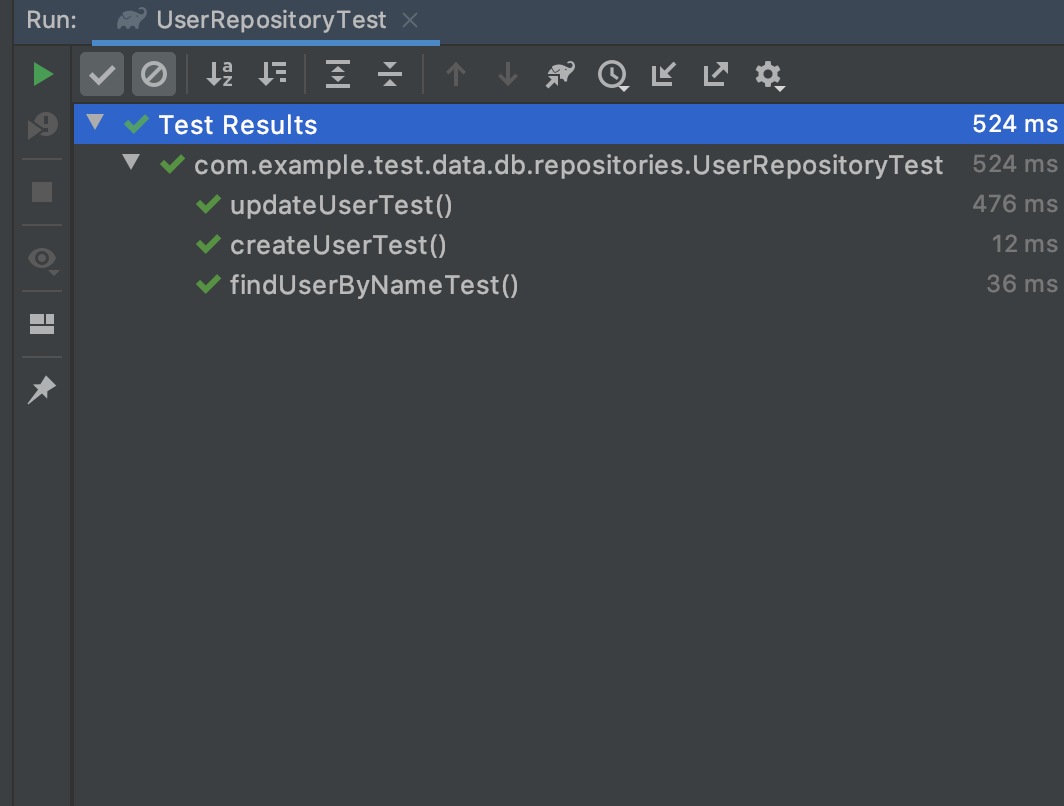
크아 깔끔하게 테스트를 통과하였다. 그렇다면 진짜 데이터가 왔다갔다 한것이 맞을까? 콘솔로 찍힌 로그를 확인해보자 !
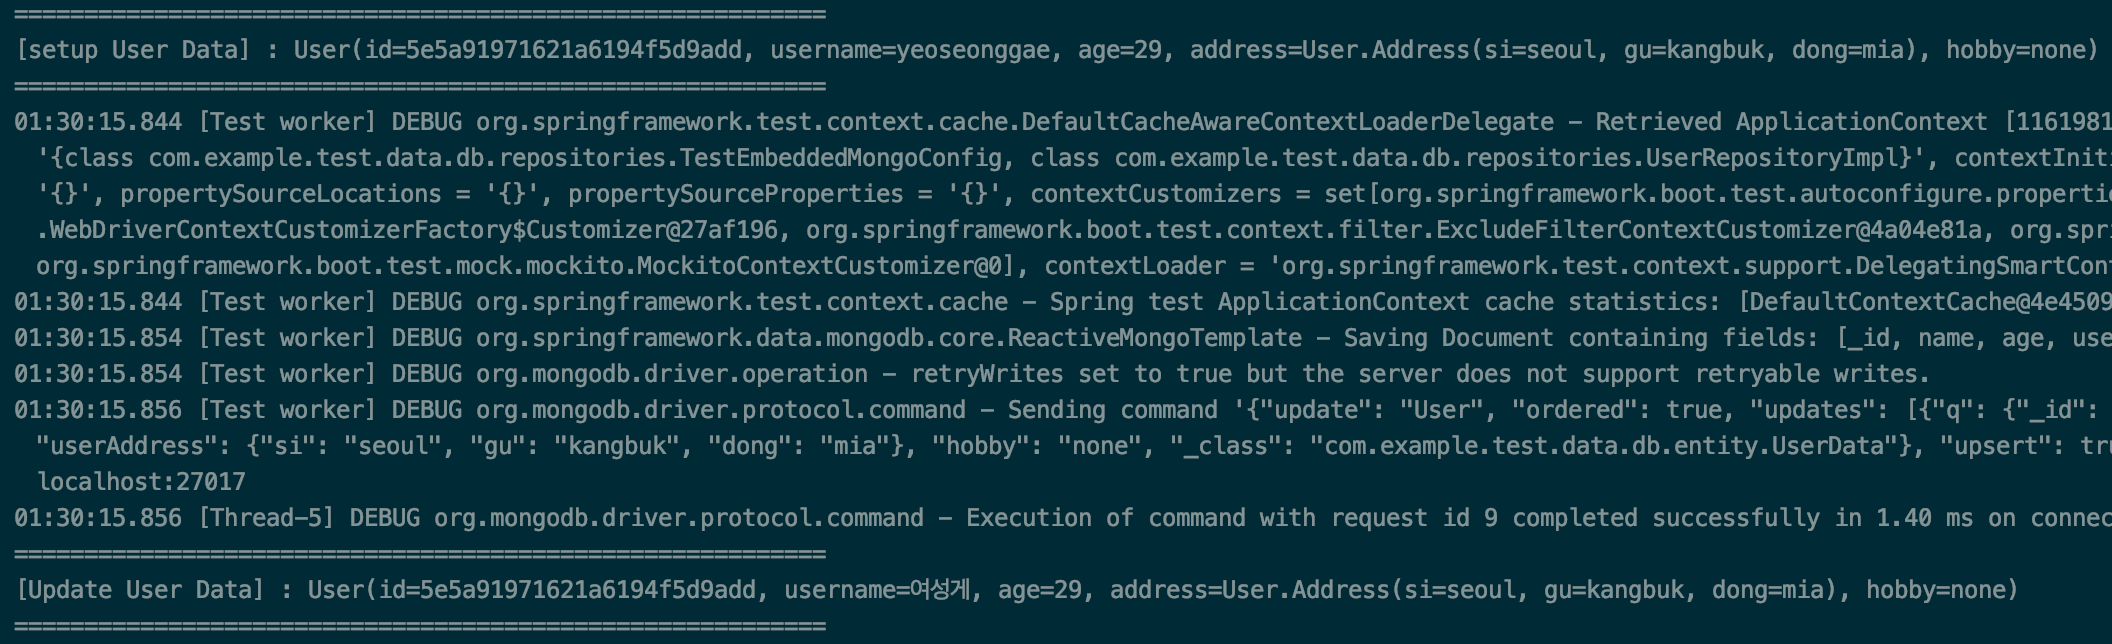
유저 데이터 수정 테스트 로그이다.
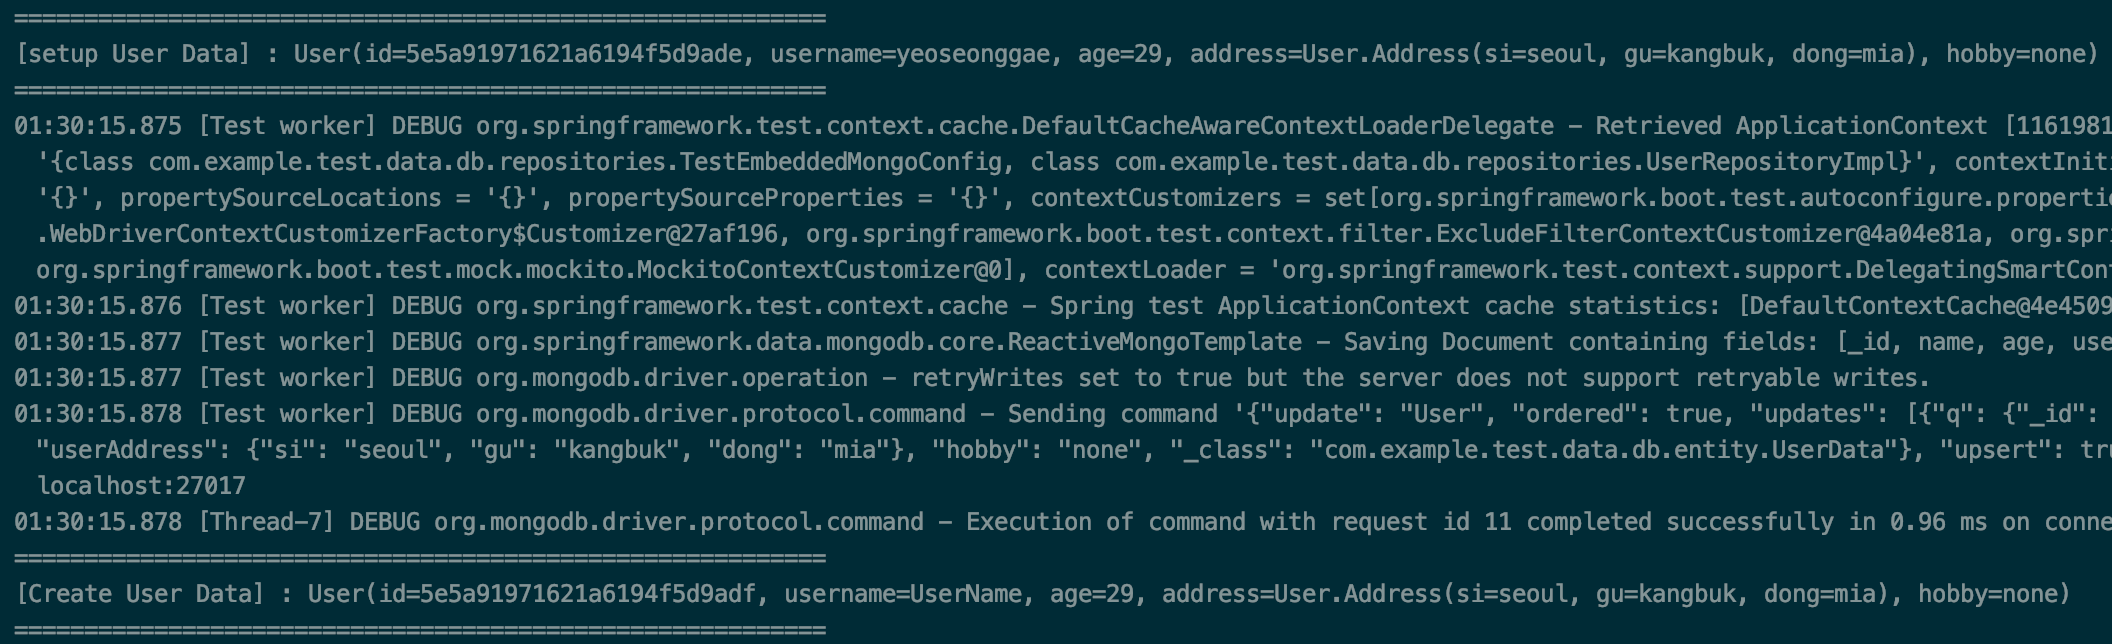
유저 데이터 생성 테스트 로그이다.

마지막으로 조회 테스트 로그이다. 실제로 데이터가 잘 찍혀있다. 여기까지 간단히 몽고디비를 이용한 DB Access unit 테스트를 다루어보았다. 정말 간단한 테스트이지만, 이 예제를 잘 이용하면 실제 서비스 클래스 영역까지 사용되어서 정말 내가 개발한 클래스가 정상 작동하는지 확인해볼 수 있다.
혹시 코드가 필요하다면 아래 깃헙를 참고하자.
yoonyeoseong/dbTest
Contribute to yoonyeoseong/dbTest development by creating an account on GitHub.
github.com
'Web > Spring' 카테고리의 다른 글

오늘 포스팅할 내용은 간단하게 Springboot Test이다. 아주 자세하게 다루어보진 않지만, 유용하고 자주 사용하는 부분이다. 간단하게 유닛테스트하는 내용은 이전 포스팅을 참고하고, 이번 내용은 Springboot 환경에서의 테스트 내용을 다룰것이다.
TDD - 테스트 주도 개발(Test Driven Development)
작성하려는 코드가 있다면 항상 먼저 어떻게 그 코드를 테스트할지 고민해야한다. 코드를 작성한 후에 어떻게 테스트할지 고민하기보다 작성할 코드를 묘사하는 테스트를 설계해야 한다. 이것이 테스트 주도 개발..
coding-start.tistory.com
다음 코드는 Springboot에서 빈으로 등록된 객체들을 사용할수 있게하는 테스트이다. 즉, ApplicationContext를 띄우는 것이다.
|
1
2
3
4
5
6
7
8
9
10
11
12
13
14
15
16
17
18
19
20
21
22
23
24
25
26
27
28
29
30
31
32
33
34
35
36
|
============application.properties============
test.property=test-property
==============================================
@Service
public class CommonService {
@Autowired
private CommonBean commonBean;
public String print(){
String result = commonBean.print();
System.out.println(result);
return result;
}
}
@Component
public class CommonBean {
@Value("${test.property}")
private String testProperty;
public String print(){
System.out.println(testProperty);
return testProperty;
}
}
@RunWith(SpringRunner.class)
@SpringBootTest
public class TestPropertyTest {
@MockBean
private CommonBean commonBean;
@Autowired
private CommonService commonService;
@Test
public void print(){
commonBean.print();
}
}
|
cs |
위 테스트는 성공적으로 통과할 것이다. 하지만 여기서 하나 문제점이 존재한다. 만약 아주 큰 애플리케이션이라 ApplicationContext 로드에 아주 긴 시간이 걸린다면 작은 테스트를 하나 수행할때마다, 긴 시간이 걸릴 것이다. 이러할때, 우리가 테스트에 필요한 빈만 띄울수 있다. 아래 코드를 확인하자.
|
1
2
3
4
5
6
7
8
9
10
11
12
13
14
15
16
|
@RunWith(SpringRunner.class)
@ContextConfiguration(classes = {
CommonService.class,
CommonBean.class
},initializers = ConfigFileApplicationContextInitializer.class)
public class TestPropertyTest {
@Autowired
private CommonService commonService;
@Test
public void print(){
commonService.print();
}
}
|
cs |
2가지 방법이 존재한다. 첫번째 방법은 @ContextConfiguration 어노테이션을 이용하는 방법이다. 인자로 빈으로 띄울 클래스를 넘긴다. 여기서 중요한것을 관련된 클래스도 모두 넣어줘야한다는 것이다. 위를 예를 들면 CommonService 클래스를 빈으로 등록할 것인데, 해당 클래스의 내용을 보면 CommonBean을 DI받고 있으므로, CommonBean도 빈으로 띄워줘야하는 것이다. 나중에 다루어볼 것이지만 위와같이 빈으로 띄울 클래스를 명시적으로 등록해도되지만, 굳이 테스트에 사용하지 않으면 Mock 빈으로 등록해주어도 된다. 두번째 인자는 initializers이다. 만약 이 인자가 없다면, CommonBean에서 @Value로 DI 받고있는 프로퍼티값을 주입받지 못한다. 즉, application.properties의 내용을 읽지 못하는 것이다. 내부적으로 @Value를 받기위한 빈이 뜨지 못해서 그런 것 같다. 이와 같은 문제를 해결하기 위해서 initializers = ConfigFileApplicationContextInitializer.class를 등록해주므로써 프로퍼티값을 읽어 올 수 있게 하였다.
두번째 방법은 아래와 같다. @SpringBootTest를 이용하여 더 간단한 설정으로 SpringBoot Test를 위한 설정을 할 수 있게된다. 또한 테스트에만 사용할 프로퍼티를 정의할 수도 있다.
|
1
2
3
4
5
6
7
8
9
10
11
12
13
|
@RunWith(SpringRunner.class)
@SpringBootTest(classes = {CommonBean.class,CommonService.class}
,properties = {"test.property=dev-property"})
public class TestPropertyTest {
@Autowired
private CommonService commonService;
@Test
public void print(){
commonService.print();
}
}
|
cs |
두번째는 Mock빈을 이용하는 방법이다.
|
1
2
3
4
5
6
7
8
9
10
11
12
13
14
15
16
17
18
|
@RunWith(SpringRunner.class)
@ContextConfiguration(classes = {
CommonService.class
},initializers = ConfigFileApplicationContextInitializer.class)
public class TestPropertyTest {
@MockBean
private CommonBean commonBean;
@Autowired
private CommonService commonService;
@Test
public void mockBeanTest(){
given(commonBean.print()).willReturn("Test Result");
commonService.print();
}
}
|
cs |
CommonService의 비즈니스 로직을 테스트하고 싶은데, 굳이 CommonBean은 띄울 필요가 없을때, 위와 같이 MockBean을 등록해서 임의로 Mock 빈이 리턴할 값을 명시할 수 있다. 위 소스는 CommonService만 테스트를 위한 빈으로 띄우는데, 내부적으로 관련있는 CommonBean은 띄우지 않고 Mock 빈으로 띄운다. 그리고 CommonBean이 리턴하는 값을 임의로 "Test Result"라는 값으로 지정해주었다. 이렇게 테스트할 빈만 집중하여 테스트가 가능해지며 사이드 코드의 양을 줄일 수 있게 된다.
다음은 간단하게 Controller를 테스트할 수 있는 코드이다.
|
1
2
3
4
5
6
7
8
9
10
11
12
13
14
15
16
17
18
19
|
RunWith(SpringRunner.class)
@WebMvcTest(controllers = CommonTestController.class)
@ContextConfiguration(classes = {
CommonTestController.class,
CommonBean.class,
CommonService.class}
,initializers = ConfigFileApplicationContextInitializer.class)
public class TestControllerTest {
@Autowired
private MockMvc mockMvc;
@Test
public void resultTest() throws Exception {
MvcResult result = mockMvc.perform(MockMvcRequestBuilders.get("/test/common")).andReturn();
System.out.println(result.getResponse().getContentAsString());
}
}
|
cs |
굳이 스프링을 실행시키지 않고도 컨트롤러를 테스트할 수 있다. @WebMvcTest 어노테이션을 이용하여 스프링 컨트롤러 테스트가 가능한 설정을 띄워준다. 즉, MVC관련 빈만 띄워 더욱 가볍게 스프링 컨트롤러 테스트가 가능하다. 위와 같은 어노테이션도 가능하며 아래와 같은 어노테이션 설정도 사용가능하다.
|
1
2
3
4
5
6
7
8
9
10
11
12
13
14
15
16
17
18
19
|
@RunWith(SpringRunner.class)
@AutoConfigureMockMvc
@SpringBootTest(classes = {
CommonTestController.class,
CommonBean.class,
CommonService.class
})
public class TestControllerTest {
@Autowired
private MockMvc mockMvc;
@Test
public void resultTest() throws Exception {
MvcResult result = mockMvc.perform(MockMvcRequestBuilders.get("/test/common")).andReturn();
System.out.println(result.getResponse().getContentAsString());
}
}
|
cs |
@AutoConfigureMockMvc 어노테이션을 이용하여 MVC 테스트를 위한 설정을 AutoConfiguration하게 할수 있다. 물론, MVC테스트를 위하여 내부적으로 내/외부 연동코드가 있다면 내/외부연동을 하지 않기 위해 Mock 빈등을 이용하여 테스트 가능하다.
|
1
2
3
4
5
6
7
8
9
10
11
12
13
14
15
16
17
18
19
20
21
22
23
|
@RunWith(SpringRunner.class)
@AutoConfigureMockMvc
@SpringBootTest(classes = {
CommonTestController.class
})
public class TestControllerTest {
@Autowired
private MockMvc mockMvc;
@MockBean
private CommonBean commonBean;
@MockBean
private CommonService commonService;
@Test
public void resultTest() throws Exception {
given(commonBean.print()).willReturn("test");
given(commonService.print()).willReturn("test");
MvcResult result = mockMvc.perform(MockMvcRequestBuilders.get("/test/common")).andReturn();
System.out.println(result.getResponse().getContentAsString());
}
}
|
cs |
마지막으로 테스트만을 위한 application.properties를 사용는 방법이다. 우선, application-test.properties를 classpath 밑의 resources 폴더 안에 넣어준다.(기존 application.properties 경로와 동일) 그리고 아래와 같이 @ActiveProfile 어노테이션을 이용하여 프로파일을 이용하여 읽어올 프로퍼티파일을 명시한다.
|
1
2
3
4
5
6
7
8
9
10
11
12
13
14
15
16
17
18
19
20
|
@RunWith(SpringRunner.class)
@AutoConfigureMockMvc
@SpringBootTest(classes = {
CommonTestController.class,
CommonBean.class,
CommonService.class
})
@ActiveProfiles("test")
public class TestControllerTest {
@Autowired
private MockMvc mockMvc;
@Test
public void resultTest() throws Exception {
MvcResult result = mockMvc.perform(MockMvcRequestBuilders.get("/test/common")).andReturn();
System.out.println(result.getResponse().getContentAsString());
}
}
|
cs |
위 코드는 기존 application.properties가 아닌, application-test.properties 파일을 읽어 컨텍스트를 구성할 것이다.
아주 간단하게만 springboot test를 다루어봤는데, 추후 포스팅에서 지금까지 다룬 내용과 더 자세한 테스팅관련 기술을 다루어볼 것이다.
'Web > Spring' 카테고리의 다른 글
| Spring - ResponseBodyAdvice를 이용한 응답값 가공! (0) | 2019.10.18 |
|---|---|
| Springboot - Custom Annotation(커스텀 어노테이션)과 Interceptor를 이용한 컨트롤러 인증.(컨트롤러 전처리, 후처리) (0) | 2019.10.12 |
| Spring - Spring Cache 추상화(스프링 캐시 추상화),@Cacheable,@CacheEvict,@CachePut (0) | 2019.09.11 |
| Spring - Model Validation 방법!(파라미터 Validation),@Valid (0) | 2019.09.10 |
| Spring - @RequestParam, @ModelAttribute의 차이점? (0) | 2019.09.10 |